> For the complete documentation index, see [llms.txt](https://ajuda.goomer.com.br/goomergo/llms.txt). Markdown versions of documentation pages are available by appending `.md` to page URLs; this page is available as [Markdown](https://ajuda.goomer.com.br/goomergo/painel/impressoras/modelos-de-impressora/elgin-i9-ajuste-de-margem-e-corte.md).
# Elgin i9 - Ajuste de Margem e Corte
{% hint style="danger" %}
A instalação do driver deve ser feita seguindo as instruções do fabricante. Segue o link da[ ](https://www.elgin.com.br/Produtos/Automacao/impressoras-nao-fiscais-termicas/impressora-termica-de-cupom-i8)[Elgin i9](https://www.elgin.com.br/Produtos/Automacao/ImpressorasNaoFiscais/impressora-termica-de-cupom-i9-full), quaisquer dúvidas referente a instalação da impressora você deve entrar em contato diretamente com o fabricante.[ ](https://www.elgin.com.br/Produtos/Automacao/ImpressorasNaoFiscais/impressora-termica-de-cupom-i9-full)
{% endhint %}
## 1 . Ajuste de Margem (Windows)
1.1 Para alterar a margem clicar no **Iniciar**
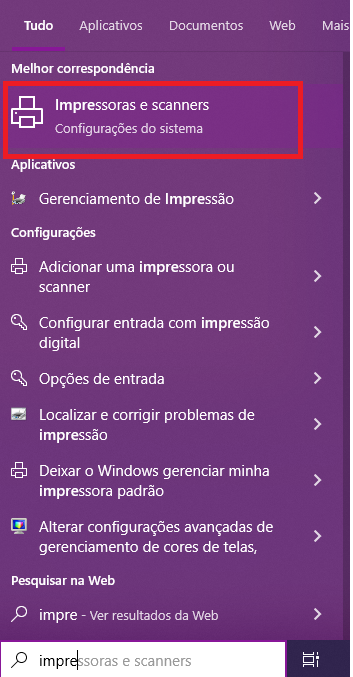
1.2 Digitar no campo de busca **Impressoras e Scanners**
1.3 Depois Selecione a **Impressora**
1.4 Clique no Botão **Gerenciar**
3.5 Depois em **Propriedades da Impressão**
3.6 Clicar em **Padrões de Impressão** de **Elgin i9** e verificar na aba **Page:**
{% hint style="info" %}
Recomendamos deixar 72 x297 mm se sua bobina for de 80mm. Segue exemplo de impressão com a margem correta.

{% endhint %}
####
## 2.Corte da Impressão
2.1 Refazer o Passo 1.1 a 1.4 clicar em **Propriedades da Impressora**
2.2 Ir em **Configurações Avançadas** na aba **Economize Papel** e selecionar **Economize Papel** .
2.3 Ir em **Configurações Avançadas** na aba **Papel cortado** e selecionar em **Tempo de** a opção **Fim do Documento**